Pasadena House Register is a local resource covering house painting in Pasadena, CA. The guides below explain materials, typical costs, local considerations, and how the work is usually done.
Ask ten people how often an exterior should be repainted and you will hear ten different intervals, most of them borrowed from climates nothing like Pasadena's. A house at the foot of the San Gabriel Mountains lives through long, hot, dry summers, intense ultraviolet light for most of the year, periodic Santa Ana wind events, and a short rainy season that can arrive hard. Those conditions wear paint in a particular way. Heat and sun break down the binder that holds a coating together, while the occasional soaking finds any joint or crack that has opened up since the last coat. The honest answer to "how often" is that your house will tell you, and the useful skill is learning to read it before small wear turns into expensive preparation work.
Why a single number does not work
A repaint schedule is really the sum of several separate clocks running on the same building. The stucco body of a Spanish Colonial Revival home ages at a different pace from the wood fascia above it. The front door, which faces the street and gets handled every day, wears on its own timeline. The west wall that bakes every afternoon fails sooner than the north wall shaded by a neighbor's oak. Treating the whole house as one unit with one due date is how people end up repainting sound surfaces while the ones that actually needed attention have already started to rot.
A better approach is to think in zones. Most houses have at least four: the main wall surface, the wood trim and fascia, doors and window sashes, and the horizontal or near-horizontal parts such as sills, railings, porch floors and the tops of beams. Each zone gets looked at on its own and repainted when it needs it. Trim and horizontal surfaces nearly always come due first, and keeping them in good shape protects the wall body so it can go longer between full coats.
The factors that shorten or stretch the cycle
Sun exposure and orientation
Ultraviolet light is the single biggest enemy of exterior paint in Pasadena. It degrades the resin binder, which is why paint on south and west elevations fades, chalks and eventually cracks well ahead of paint on the north side. When you plan maintenance, expect the sunniest faces of the house to lead. Many owners repaint only the south and west elevations on a shorter cycle and the whole house on a longer one, which keeps appearance even without paying to recoat walls that are still performing.
Siding material
Cement stucco is a stable substrate and paint on it usually lasts longer than paint on wood, provided the stucco is sound and not wicking moisture from the soil or from sprinklers. Wood siding and trim expand and contract with heat and humidity, and that constant movement stresses the film. Older Craftsman homes with cedar or redwood shingles, exposed rafter tails and deep eaves have a lot of wood surface, and much of it is end grain, which absorbs and releases water faster than face grain.
Color
Dark colors absorb more heat, which increases surface temperature and wood movement. They also show fading sooner because there is more visible pigment to lose. A deep green or charcoal body may look tired well before a pale cream on the same wall. That does not mean you should avoid dark colors, only that you should plan to look at them more often.
The quality of the last job
You often inherit a previous owner's paint job without knowing how it was done. Paint applied over chalky or dirty surfaces, over unprimed bare wood, or in a single thin coat will fail early no matter what the label promised. If the house was painted shortly before you bought it and is already peeling on the trim, the cause is almost always preparation, and the next cycle will be shorter until that is corrected.
Water sources you control
Sprinklers, drip lines, downspouts that empty against the foundation and planters built against the wall all feed moisture into the lower part of the house. Paint at the base of a wall that gets wet every morning will blister and peel years before the paint a few feet higher. Moving a sprinkler head can do more for the life of your paint than any product upgrade.
A twice-yearly walk-around
The most reliable way to time repainting is a slow inspection twice a year. Late spring, before the heat builds, and late fall, before the rains, work well in Pasadena. Take a notebook or your phone and walk the entire perimeter, then do it again looking up.
Wipe test. Rub a dark cloth or your palm across a sunny wall. A heavy white or colored powder means the binder is breaking down.
Trim edges and sills. Look at the bottom edges of window sills, the ends of fascia boards and the lower ends of door casings. Paint lifting at these edges is usually the first sign of water getting into wood.
Joints. Check caulked seams where trim meets siding and around windows. Gaps, shrinking or hardened caulk will let water behind the paint.
Stucco surface. Look for hairline cracks, especially around window corners, and for patches of powdery or discolored paint near the ground.
Horizontal surfaces. Porch rails, steps, beam tops and fence caps take direct sun and standing water. They tell you early what the rest of the house will do later.
Photograph. Take the same set of photos each time from the same spots. Comparing them over a few seasons shows the rate of change far better than memory does.
The cost of waiting too long
Costs are driven by preparation more than by the paint itself. When you repaint while the old film is still intact and only faded or lightly chalked, preparation is mostly cleaning, light sanding and spot priming. When you wait until the film is cracked through and peeling in sheets, every loose area must be scraped, feathered and primed, bare wood must be dealt with, and any softened wood must be repaired before paint can go on. On houses built before 1978, disturbing old paint may also involve lead paint, and the extra containment and cleanup that brings is a real cost factor. The larger the area of failed paint, the more of these steps apply.
There is also a point of no return for wood. Once water has been getting behind loose paint for a season or two, the surface fibers turn gray and weak, and paint will not bond well to them even after scraping. That wood then has to be sanded back to sound material or replaced. Catching a peeling sill in its first season usually means a quick scrape and prime. Catching it in its third can mean a new sill.
Keeping a record makes the next decision easier
Write down when each zone was last painted, what product and sheen went on, and what you saw at each inspection. Over a few years you will learn how your particular house behaves, including which wall leads, how quickly the trim goes, and whether the stucco is holding up. That record turns a vague question into a practical one: the west trim was done four summers ago, it is starting to lift at the sill ends, so it goes on the list for next spring.
Pasadena's climate is kind to people and fairly hard on paint. A house that is looked at twice a year, repaired in small pieces and repainted by zone will stay tight and good-looking for far longer than one that is ignored until the whole exterior needs attention at once.
Paint rarely fails for no reason. Each type of breakdown leaves a pattern, and the pattern points to a cause. Learning to read those patterns matters because the cause decides the fix. Chalking caused by sun needs a thorough wash and a fresh coat. Peeling caused by water needs the water source found and stopped, or the new paint will peel in the same spot. This guide walks through the failures you are most likely to see on houses around Pasadena, where strong sun, hot summers and seasonal rain do most of the damage, and explains what each one is telling you.
Chalking
Chalking is the fine powder that comes off on your hand when you rub a painted wall. It forms when ultraviolet light breaks down the binder at the surface of the film, freeing pigment particles that are no longer held in place. All exterior paints chalk to some degree as they age, and some older formulations were designed to chalk slowly so the surface would self-clean in rain. In Pasadena, where sun exposure is heavy for most of the year, chalking is often the first visible sign of aging on south and west walls.
Light chalking on its own is not a crisis. It becomes a problem in two ways. First, chalk washing down a wall can streak onto brick, stone or a lower surface of a different color. Second, fresh paint applied over a chalky surface bonds to the loose powder instead of to the sound film underneath, and it will peel early. If the wipe test leaves a heavy deposit, the wall has to be washed and allowed to dry thoroughly before any recoating, and a bonding primer may be needed where chalk will not fully come off.
Fading
Fading is a loss of color intensity, and it usually shows up alongside chalking because both come from sun exposure. Some pigments hold color better than others. Many reds, bright yellows and deep blues fade faster than earth tones and whites. You will notice it most at the edges of shaded areas, behind downspouts, under eaves or where a shutter has been removed, since those spots keep their original color while the surrounding wall lightens.
Fading by itself is cosmetic, but it has a practical consequence. Once a wall has faded, a touch-up with paint from the original can will not match, because the can holds the color the wall used to be. That is why patched areas on a faded house often stand out as darker rectangles. If fading is significant, plan on recoating whole walls from corner to corner rather than spotting in small repairs.
Peeling and flaking
Peeling means the paint has lost adhesion and is lifting away from the surface beneath it. It is the most important failure to diagnose correctly because it is nearly always caused by one of a few conditions, and each needs a different response.
Moisture behind the film
Water getting into wood from behind or from an unsealed edge pushes paint off as it tries to escape. This peeling tends to show up at the bottom of walls, around windows and doors, on the lower ends of trim boards, below gutters and near sprinklers. The paint often comes off down to bare wood, and the wood underneath may look gray or feel damp. Painting over this without stopping the water only resets the clock.
Poor preparation
If paint was applied over dirt, chalk, glossy old paint that was not dulled, or bare wood that was never primed, it will peel in a more random pattern, often in sheets, sometimes revealing a clean layer of old paint underneath. This is a failure of the previous job, and it means the loose material must be removed down to a layer that is firmly bonded.
Incompatible layers
Latex paint applied directly over old oil-based or alkyd enamel without proper preparation can fail to grip, especially on trim and doors. The top layer may peel away cleanly from the glossy layer beneath. A simple test is a small piece of tape pressed firmly onto a scored area and pulled quickly. If paint comes away on the tape, the bond between coats is weak.
Cracking, checking and alligatoring
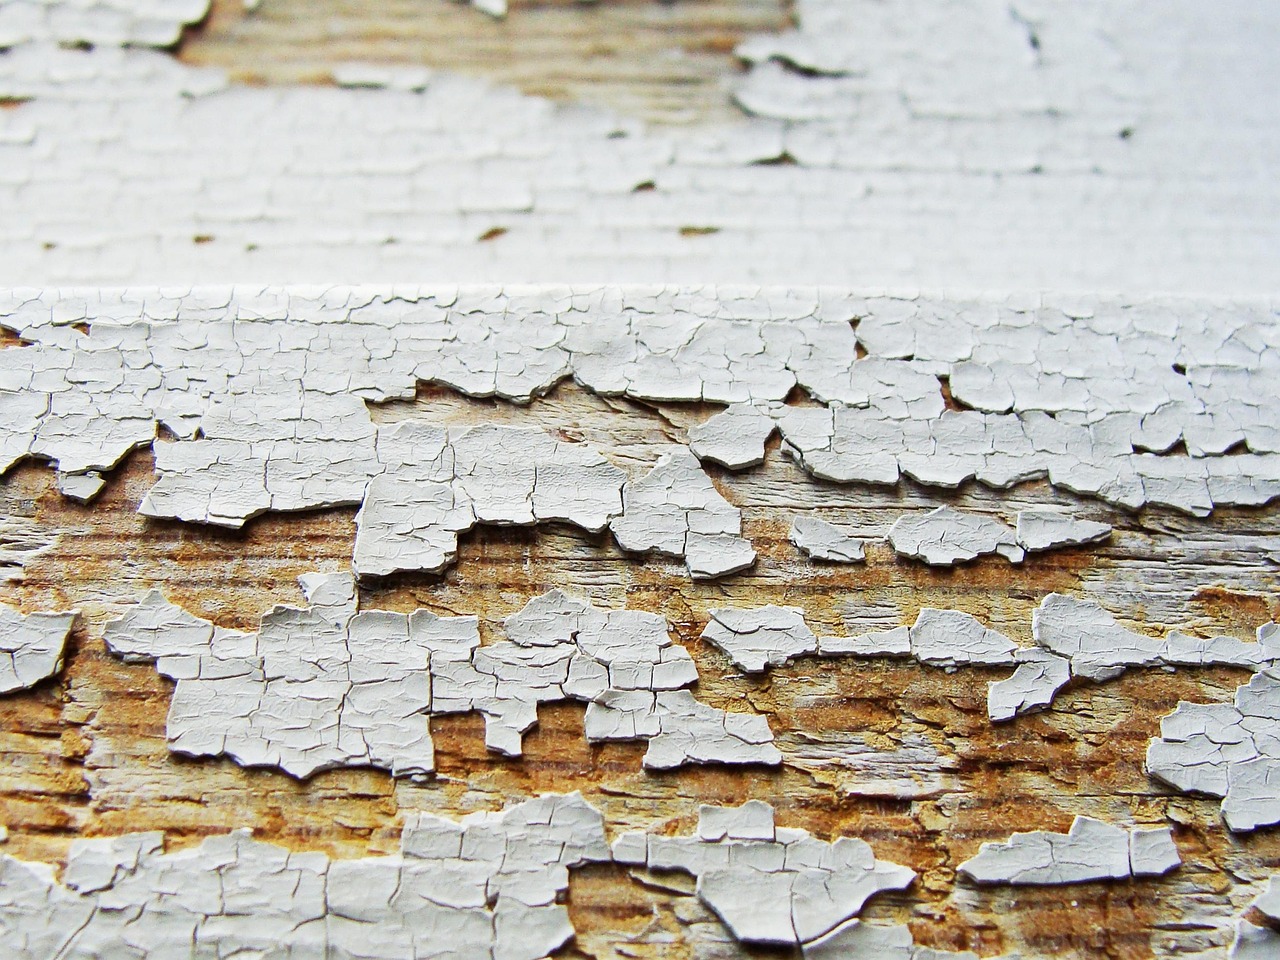
Cracking describes splits through the paint film. When the cracks are fine and shallow, running in a grid or along the grain, they are often called checking. When they form a deep pattern of irregular plates that looks like reptile skin, the term is alligatoring.
These failures come from the paint film becoming too hard and brittle to move with the surface beneath it. Wood swells and shrinks with heat and moisture, and a film that has lost its flexibility splits instead of stretching. Heavy buildup of many old coats makes this more likely, and old oil paints are especially prone to it as they age. Alligatoring on older Pasadena homes often signals decades of layers, sometimes including lead-based paint on houses built before 1978.
Shallow checking can sometimes be sanded smooth and recoated. Cracks that go through to the substrate let water in and will keep spreading. Severe alligatoring usually means the old paint must be removed down to a stable layer or bare substrate before anything new will last, and with older homes that removal should be handled with lead-safe methods.
Blistering
Blisters are bubbles in the paint film. To find the cause, cut one open with a sharp knife. If there is bare wood or stucco at the bottom, moisture from inside the wall or the substrate pushed the paint away. If there is an older layer of paint at the bottom, the blister most likely formed from heat, usually when paint was applied in direct hot sun or on a surface that was too warm, trapping solvent that tried to escape. Heat blisters are common on dark colors applied to west walls in summer. Moisture blisters point back to the same water sources that cause peeling.
Staining that looks like paint failure
Several stains can be mistaken for paint breakdown, and treating them as paint problems wastes effort.
Mildew. Dark gray, green or black speckles, usually on shaded, damp surfaces such as north walls and areas under dense trees. Place a drop of diluted household bleach on a spot. If it lightens within a minute or two, it is mildew rather than dirt.
Rust streaks. Reddish brown runs below nail heads or metal fasteners mean the fasteners are corroding. The nails need to be set, spot primed with a rust-inhibiting primer, and filled.
Tannin bleed. Brown or yellow blotches on light paint over redwood or cedar come from natural extractives in the wood rising through the film. A stain-blocking primer is required before repainting.
Efflorescence. White, crusty deposits on stucco or masonry are mineral salts carried out of the wall by moisture. They signal water moving through the wall and must be cleaned off and the moisture source addressed before paint will stick.
Mineral spotting. Chalky white rings or spots at a consistent height usually come from irrigation water, which leaves minerals behind as it dries.
Putting the diagnosis to work
Walk the house and note each failure you find, where it is, and how large an area it covers. Group them by cause. Sun damage on the south and west walls is a repainting question. Peeling concentrated at the base of walls and around openings is a water question first and a painting question second. Deep cracking and alligatoring are preparation questions that will drive the scope of the next job. Once the causes are sorted, you know which problems a fresh coat will solve and which ones need a repair, a sprinkler adjustment or a new gutter before paint is worth applying.
Pasadena sits in the path of two kinds of seasonal weather that leave their mark on painted surfaces. Santa Ana winds, the hot, very dry offshore winds that come down through the mountain passes, carry fine dust and grit and push debris against walls and trim. In fire years, the same winds can bring smoke and ash from fires burning in the foothills or across the region. Neither dust nor ash will usually destroy a healthy paint job on its own, but both can damage a finish if they are cleaned the wrong way, and both can quietly ruin the adhesion of a future coat if they are left in place. Knowing what these residues are and how to remove them keeps your paint working and keeps you safe while you do it.
What Santa Ana winds do to paint
During a strong wind event, fine mineral dust settles into every textured surface. Stucco, with its rough finish, holds a lot of it, and so does the grain of weathered wood. The dust is abrasive. On its own it does little harm, but rubbing or scrubbing it while dry acts like fine sandpaper on the paint film and can dull the sheen or leave swirl marks, especially on doors and trim with a satin or semi-gloss finish.
The wind also does physical damage. Palm fronds, branches and loose objects strike walls and fascia. Gates slam. Plants rub against siding. After a wind event, look for fresh dents, scrapes and gouges that expose bare wood or break the film on stucco. Any spot where the paint is broken lets water in during the next rain, and Santa Ana season often runs into the start of the wet months.
Dry heat and wind together pull moisture out of wood quickly, which makes old, hardened caulk shrink and crack. A post-wind inspection is a good time to check caulk joints around windows, doors and trim.
How to remove wind-blown dust
Wait for the wind to stop. Cleaning during an event just invites a second coat of dust.
Rinse, do not wipe. Use a garden hose with a gentle spray to float dust off, working from the top of the wall down so dirty water runs over areas you have not yet cleaned.
Use a soft brush for stubborn film. A long-handled, soft-bristle brush and a mild solution of water and gentle detergent will lift residue without scouring the paint. Rinse well afterward so soap does not dry on the surface.
Keep windows and doors in mind. Dust accumulates in the tracks of sliding doors and on sills. Clean these out so rain does not turn the dust into a gritty paste that holds water against the wood.
Wildfire smoke residue
Smoke from a wildfire carries fine particles of soot along with oily and tarry compounds released by burning vegetation and structures. When smoke hangs over a neighborhood, these particles settle on every exterior surface. On painted walls they can appear as a gray or brown film, sometimes with a faint greasy feel. On light colors, streaks may appear after the first rain as the soot runs down.
Soot is harder to remove than dust because it is partly oily and sticks to the paint. It also affects any future painting. New paint will not bond well to a surface still carrying a soot film, and the residue can bleed through light colors as discoloration. For that reason, if a wall has been exposed to heavy smoke, it must be cleaned carefully and allowed to dry before any touch-up or repaint, and a stain-blocking primer may be needed where discoloration remains after cleaning.
Cleaning smoke film
Begin with a plain water rinse to remove loose particles.
Follow with a mild detergent solution and a soft brush or sponge on a small test area first. Check that the cleaning does not remove color from the paint.
Rinse thoroughly and let the surface dry, then inspect it in daylight. Some residue may need a second pass.
Avoid strong solvents and harsh abrasives. They can soften or dull latex paint.
If smoke exposure was severe or prolonged, or you have soot deposits that do not come off with gentle cleaning, a restoration professional can assess the surface. Heavy residue sometimes requires specialized cleaning before paint can be applied safely.
Ash on painted surfaces
Ash is a different problem from soot, and it deserves more caution. Ash from burned vegetation and buildings can contain fine particles that irritate the lungs, and ash from burned structures can carry residues of metals and other materials that were in them. Public health guidance generally advises protecting yourself when handling ash: wear gloves, long sleeves, eye protection and a well-fitting respirator mask rated for fine particles, and keep children and pets away while you clean.
Ash can also be caustic when it gets wet. Wood ash in particular is alkaline, and when combined with water it can form a solution that irritates skin and may affect some finishes if it sits on them. For painted surfaces, the practical rule is to avoid letting wet ash dry in place.
Removing ash safely
Do not use a leaf blower. Blowing ash puts the finest particles back into the air, where you breathe them and where they settle again on your walls.
Avoid dry sweeping large amounts. Lightly mist the ash first to keep it from becoming airborne, then gently collect it.
Rinse gently, and do not let runoff go into storm drains. Local guidance often recommends keeping ash-laden water out of the storm drain system. Direct it toward landscaped areas where it can soak in, or collect it.
Follow with a mild detergent wash on painted surfaces once most ash is gone, then rinse and allow to dry.
Check local instructions. After a major fire, the county and city often publish specific cleanup guidance. Follow it, because it will reflect the particular hazards of that event.
Inspecting after a smoke or ash event
Once surfaces are clean and dry, walk around the house and look closely at the paint. You are checking for three things. First, discoloration that did not wash away, which indicates a need for stain-blocking primer before any repainting. Second, any softening, blistering or scorching on surfaces that faced intense heat, which can happen even without flames reaching the house if embers or radiant heat were nearby. Third, any damage from debris carried by wind during the event.
Embers are carried by wind ahead of fire and can collect in corners, gutters and against walls. Look along the base of walls, in the angle where walls meet porch floors, around vents, and along fence lines where wood meets the house. Scorch marks or small burned patches on wood trim or fencing need attention before painting. Charred wood will not hold paint, so the damaged surface must be sanded or cut back to sound material, and in some cases the board replaced.
Timing any repainting
If your walls need repainting after a smoke or ash event, wait until cleanup is complete and the surface has had time to dry fully. Air quality matters too. Painting while smoke is still in the air, or while ash is still falling, will trap particles in the wet film. When the air has cleared, confirm that the surface passes a simple wipe test with a clean white cloth. If the cloth picks up gray residue, keep cleaning before anything goes on.
Dust and ash events are part of life in Pasadena. A gentle rinse after each wind event, a careful and protected cleanup after any smoke or ash, and a close look at the paint afterward will keep a routine inconvenience from turning into a failed coat.